If you’re wanting to completely wipe your microSD card so that you can flash a new OS to it, it’s not quite as easy as inserting the card into your Windows PC and formatting it. The Linux based operating systems such as EmuELEC, Batocera, ArkOS, Retro Arena, 351 ELEC etc all create partitions on your SD card when flashed. This means that when you insert the card into your PC it shows as two or 3 different drives. In this guide we’ll have a look at how to format an SD card with Linux partitions in Windows using DiskPart.
I often see people recommending third party programs to reclaim and reformat those partitions in Windows. Actually though it’s not necessary to install anything. DiskPart is built in to Windows and can do this for you. You will need to use the command line, but it’s nothing to be afraid of. At the end of this guide you’ll have a fully functional SD card that Windows can read. It’ll be ready to flash whatever OS you want to it, or use for any other purpose.
THE SHORT VERSION
- Open DiskPart
- List the connected disks by typing “list disk“
- Select the SD card using “select disk #” where # is the number of your SD card
- Type “clean“
- Create a new partition by typing “create partition primary“
- Format the SD card by typing “format fs=fat32 quick“
- If necessary, assign a drive letter by typing “assign“
THE LONG VERSION WITH IMAGES
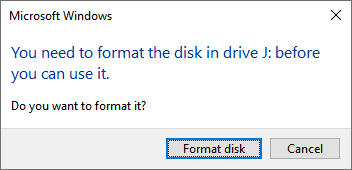
If you’ve ever inserted an SD card from an Anbernic device into a Windows PC, you’ll likely be familiar with this error message.
This happens because the SD card has partitions on it which are formatted with a Linux file system that Windows cannot read.
You might be tempted to click “Format disk”, but that’s not going to work here.
You might also notice that when you try to view the contents of the SD card, Windows is showing two or 3 new drives for it.

In order to restore this SD card to a state that is compatible with Windows, we’ll use a utility built in to Windows called DiskPart.
HOW TO USE DISKPART TO FORMAT YOUR LINUX SD CARD
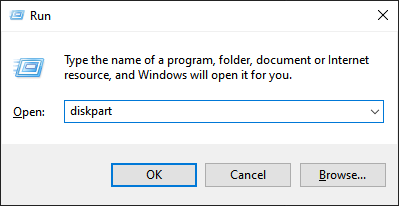
Start by inserting your SD card into the PC or card reader. Cancel or close all error messages that pop up. Next, right click the start menu (Windows 10) and select “Run”, or simply use the Windows key + R to open the run box.
Next, type diskpart and hit Enter.
Hit “Yes” on the dialog box that asks you if you want to allow this app to make changes to your device.
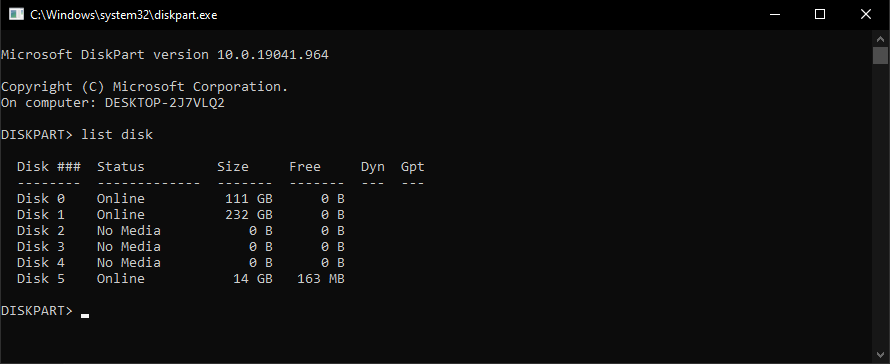
You will then be presented with the DiskPart utility screen, which is the command line interface we will use to format the SD card. Start by typing “list disk” and taking a look at the output.
SELECTING THE CORRECT SD CARD IN DISKPART
This is the only step in this guide where you need to be a little bit careful. You need to identify which of the listed disks is your SD card. If you select the wrong disk, you might damage your OS and have to reinstall or repair it.
In the above example I can see that Disk 0 and Disk 1 are the disks in my PC, as the sizes relate to the size of my C: and D: drives.
Disk 5 is my SD card, as it is roughly the size of the 16GB card in my card reader. If you are unsure, close DiskPart and remove your SD card, then load it back up and run “list disk” again. Make a note of the size of the disks listed, and then insert the SD card and run it again. The SD card will be the one that just showed up. It might not necessarily be the last one in the list. Be sure you know which one is the SD card.
CLEANING AND FORMATTING AN SD CARD IN DISKPART
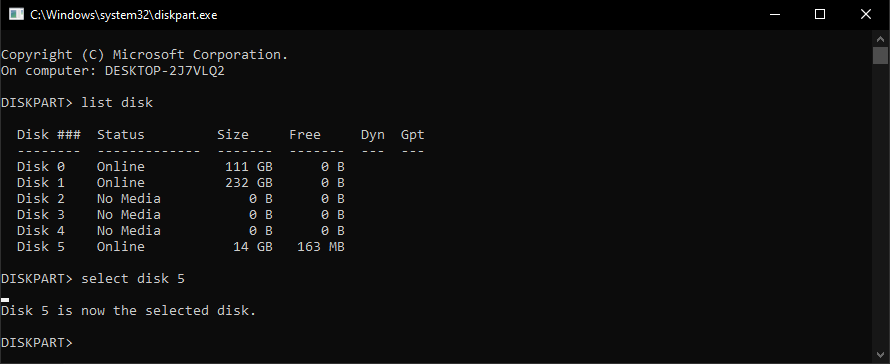
Once you’re confident, select the disk by typing “select disk #” where # is the number of your SD card. You will see the confirmation that you have selected the disk as below.
Now type “clean” and wait for the confirmation that DiskPart has cleaned your disk.
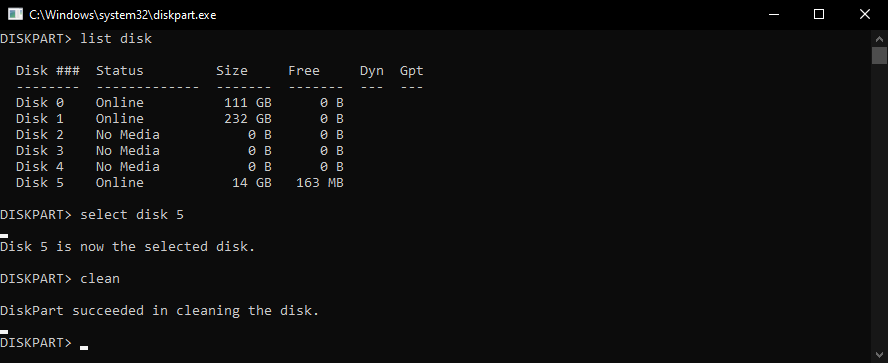
Windows will probably throw some messages at you now because the disks that were previously mounted have disappeared. Just cancel any messages that are displayed as we haven’t finished yet.
Next, type “create partition primary” and await the confirmation that it has completed.
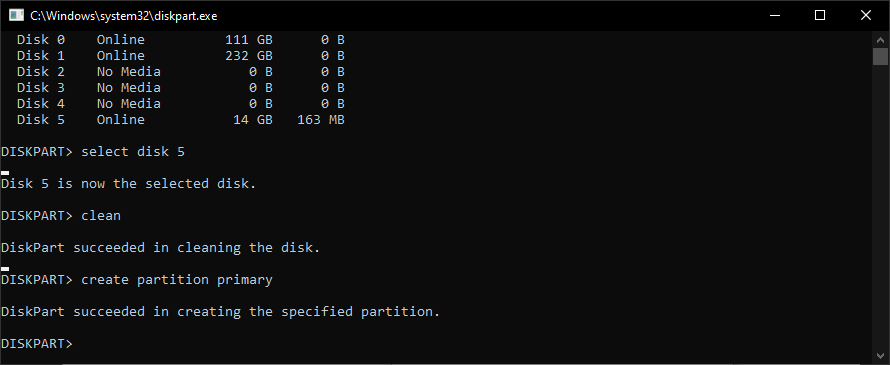
Now, type “format fs=fat32 quick“. Once it has completed, you will see a message that DiskPart has successfully formatted the volume.
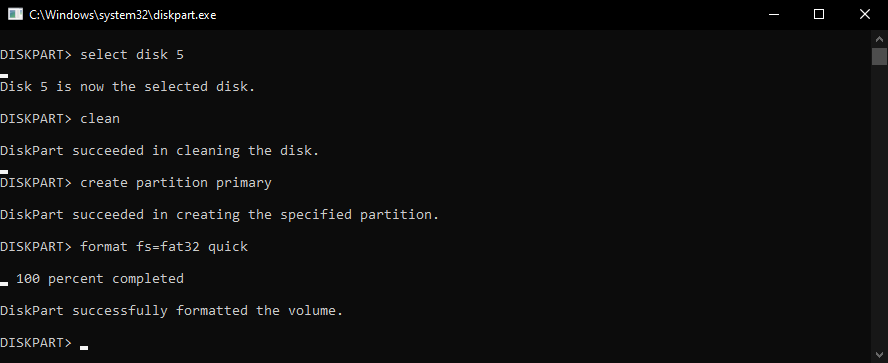
At this point Windows may automatically open your SD card window ready for you to use. If this happens, great, you’ve done and you can close DiskPart. If nothing happens and the SD card is still not listed amongst your other disks, type “assign” and hit Enter.
This tells Windows to assign a drive letter to the SD card. Once done, you will see the SD card amongst your other disks and it’ll be ready to use.
FLASHING A NEW OS
There are many options to do this. Two popular choices are balenaEtcher and Rufus. balenaEtcher is a great tool that requires very little user input, whereas Rufus has many more options. I use both for various jobs, but for flashing a new handheld OS I usually just use balenaEtcher.
Both are free and easy to use, with no bloatware or other junk included. You can grab balenaEtcher from here. Once installed, open it up and choose the “flash from file” option.
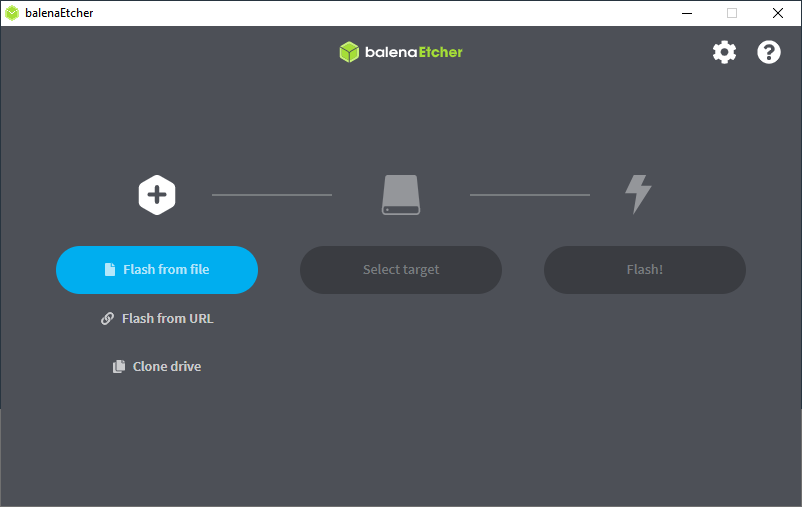
Navigate to the location of your image file and select it. It will likely either be a *.img or *.img.gz file extension. The gz indicates that it is compressed, balenaEtcher will take care of decompressing it so you don’t need to.
Once the image is loaded into balenaEtcher, hit the “select target” button. This where you will select the SD card to flash the image to. By default balenaEtcher will target a removable storage device rather than a hard disk, but just be sure you’re selecting the SD card.
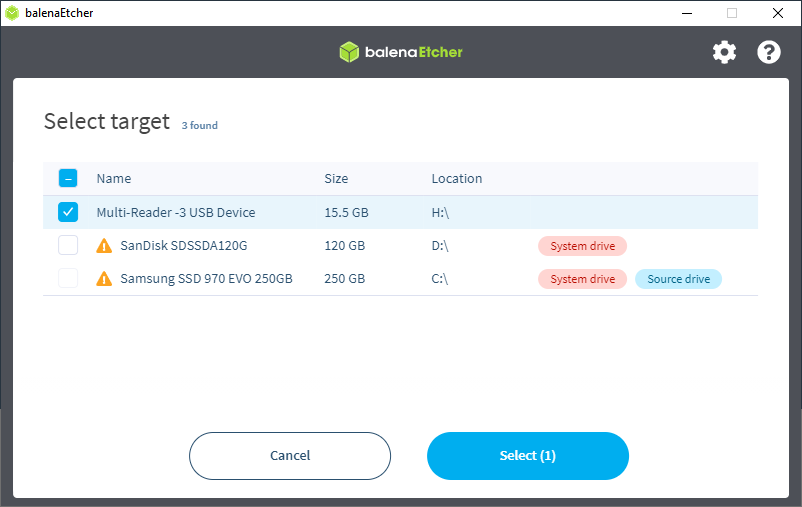
Once you’ve select the SD card, hit the “flash” button. This process will take a few minutes, and once done balenaEtcher will verify the contents of the card.
When this has finished, Windows will start complaining that you’ve inserted an SD card that it can’t recognise again.
Just hit cancel or close on all the dialog boxes.
That’s it, you can put the SD card back into your device and boot up with it. You have succesfully formatted an SD card with Linux partitions in Windows, and then flashed a new OS onto the card. Congratulations!

